Table of contents
- Before Registering the First App
- Preparing Sample Manifests
- Registering an Application via CLI
- Application CRD Structure
- Application Sync Flow
- Manual Sync vs Automatic Sync
- Sync and Health Checks
- Viewing in the UI
- Diff Review and Rollback
Before Registering the First App
In Part 2, we installed ArgoCD and confirmed the empty dashboard. Now it’s time to register an actual application.
In ArgoCD, an “Application” is a unit that connects a single Git repo (or a specific path within it) to a single cluster namespace. It’s like telling ArgoCD “deploy the manifests at this Git path to that namespace.”
For hands-on practice, let’s prepare a Git repo containing a simple Nginx Deployment and Service. You can create a repo in your own GitHub account, or use the official ArgoCD example repo.
Preparing Sample Manifests
Create the following two files in your practice Git repo.
First, the Deployment. It’s a simple setup that runs 2 replicas of an Nginx container.
# k8s/deployment.yaml
apiVersion: apps/v1
kind: Deployment
metadata:
  name: nginx-demo
  labels:
    app: nginx-demo
spec:
  replicas: 2
  selector:
    matchLabels:
      app: nginx-demo
  template:
    metadata:
      labels:
        app: nginx-demo
    spec:
      containers:
        - name: nginx
          image: nginx:1.27
          ports:
            - containerPort: 80
Next is the Service. It routes traffic to the Deployment’s Pods.
# k8s/service.yaml
apiVersion: v1
kind: Service
metadata:
  name: nginx-demo
spec:
  selector:
    app: nginx-demo
  ports:
    - port: 80
      targetPort: 80
Commit these files to the k8s/ directory of your Git repo and push.
Registering an Application via CLI
When creating a new Application in the UI, a “NEW APP” button and form appear at the top. The actual screen looks like this.
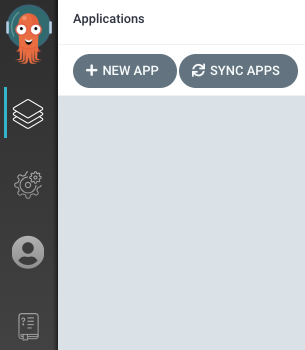
Source: ArgoCD official repository — Apache 2.0 License
However, in this guide we’ll register via the CLI. It takes just one line.
argocd app create nginx-demo \
  --repo https://github.com/<your-username>/argocd-example.git \
  --path k8s \
  --dest-server https://kubernetes.default.svc \
  --dest-namespace default
Here’s what each flag means:
--repo: Git repo URL where the manifests are located--path: Directory within the repo where the manifests reside--dest-server: Target cluster for deployment (usehttps://kubernetes.default.svcfor in-cluster)--dest-namespace: Namespace to deploy to
We’ve only registered the app — it hasn’t been deployed yet. By default, ArgoCD creates Applications in manual sync mode, so you need to explicitly trigger a sync.
Application CRD Structure
While the CLI is convenient, in practice it aligns better with the GitOps philosophy to define Applications as YAML and store them in Git. After all, an Application itself is a Kubernetes Custom Resource.
Below is the Application CRD equivalent to the CLI command above.
apiVersion: argoproj.io/v1alpha1
kind: Application
metadata:
  name: nginx-demo
  namespace: argocd
spec:
  project: default
  source:
    repoURL: https://github.com/<your-username>/argocd-example.git
    targetRevision: HEAD
    path: k8s
  destination:
    server: https://kubernetes.default.svc
    namespace: default
  syncPolicy:
    automated:
      prune: true
      selfHeal: true
    syncOptions:
      - CreateNamespace=true
Let’s break down each field.
metadata
name: The Application name. This is how it’s identified in the ArgoCD UI and CLInamespace: The namespace where the Application CRD itself resides. This must beargocd
spec.project
- The ArgoCD project. It’s a unit that groups repo/cluster access permissions. The default value
defaultallows all repos and clusters
spec.source
repoURL: Git repo addresstargetRevision: The branch, tag, or commit hash to track.HEADmeans the latest commit on the default branchpath: Path to the manifest directory within the repo
spec.destination
server: API server address of the target clusternamespace: Namespace where resources will be deployed
spec.syncPolicy
- This is the key section that determines manual sync vs automatic sync. We’ll cover this in detail in the next section
Apply this YAML with kubectl apply to register the Application.
kubectl apply -f application.yamlApplication Sync Flow
Once an Application is registered, let’s look at the order in which sync happens inside ArgoCD.
sequenceDiagram
    participant Git as Git Repository
    participant Repo as Repo Server
    participant Controller as Application Controller
    participant K8s as Kubernetes Cluster

    Git->>Repo: 1. Git clone / pull
    Repo->>Repo: 2. Manifest rendering (Helm, Kustomize, etc.)
    Repo->>Controller: 3. Pass rendered manifests
    Controller->>K8s: 4. Query current cluster state
    Controller->>Controller: 5. Compare desired vs live state
    alt OutOfSync detected
        Controller->>K8s: 6. kubectl apply (apply manifests)
        K8s-->>Controller: 7. Return apply result
        Controller->>Controller: 8. Perform health check
    end
Starting from Git, the Repo Server prepares the manifests, and the Application Controller compares them with the cluster state and performs a sync if there’s a difference. Understanding this flow naturally leads to understanding the difference between manual and automatic sync.
Manual Sync vs Automatic Sync
How you configure syncPolicy when registering an Application completely changes its behavior.
Manual Sync
If you omit or leave syncPolicy empty, the Application operates in manual sync mode. Even when changes are made in Git, ArgoCD only shows the “OutOfSync” status and doesn’t actually deploy.
You need to trigger the sync yourself.
argocd app sync nginx-demoOr you can press the SYNC button in the web UI. Manual sync is suitable for production environments where you want to review changes before deployment.
Automatic Sync
Setting syncPolicy.automated causes ArgoCD to sync automatically as soon as a Git change is detected.
syncPolicy:
  automated:
    prune: true
    selfHeal: true
There are two important options:
- prune: Whether to delete resources from the cluster when they’re removed from Git. If
false, removing a manifest from Git leaves the resource in the cluster. In practice, setting this totruekeeps things clean - selfHeal: Whether ArgoCD should revert direct modifications (like someone using
kubectl edit) back to the Git state. Since the core principle of GitOps is “Git is the source of truth,”trueis the common setting
Automatic sync is particularly useful in development environments. Since committing automatically reflects changes in the cluster within seconds, the feedback loop becomes shorter. For production, teams often use manual sync or add a PR approval gate alongside automatic sync.
Sync and Health Checks
When a sync is executed, ArgoCD applies the manifests to the cluster and then performs health checks.
argocd app get nginx-demoThis command shows the current state of the Application. There are two status values to pay attention to in the output.
Sync Status — Whether Git and the cluster match
Synced: Git and the cluster are in agreementOutOfSync: There’s a difference
Health Status — The actual operational state of resources
Healthy: All resources are functioning normallyProgressing: Deployment is in progress (e.g., rolling update)Degraded: Some resources have problemsMissing: Resources don’t exist in the cluster
The ideal state is Synced + Healthy. If it’s Synced but Degraded, the manifests were applied but Pods aren’t coming up properly — check the Pod logs.
argocd app get nginx-demo --show-operationAdding the --show-operation flag shows detailed results of the last sync operation, which is helpful for debugging.
Viewing in the UI
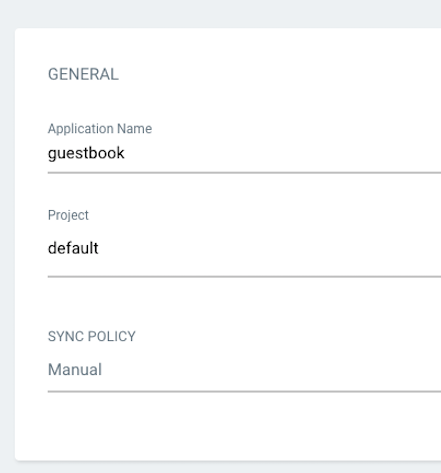
Source: ArgoCD official repository — Apache 2.0 License
The web UI is much more intuitive. Clicking an Application card reveals the resource tree.
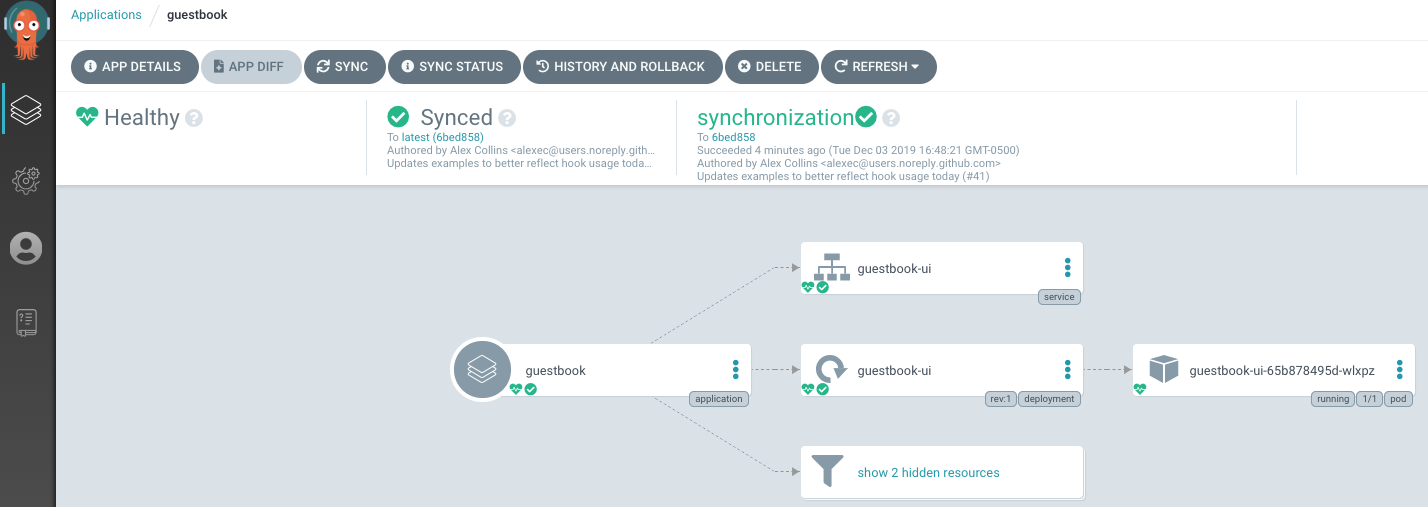
Source: ArgoCD official repository — Apache 2.0 License
In text form, it looks like this:
Application: nginx-demo
├── Service: nginx-demo
└── Deployment: nginx-demo
    └── ReplicaSet: nginx-demo-xxx
        ├── Pod: nginx-demo-xxx-abc
        └── Pod: nginx-demo-xxx-def
Each node displays sync status and health status with colors. Green means healthy, yellow means in progress, and red means there’s a problem.
The overall Application list is displayed as cards like this:
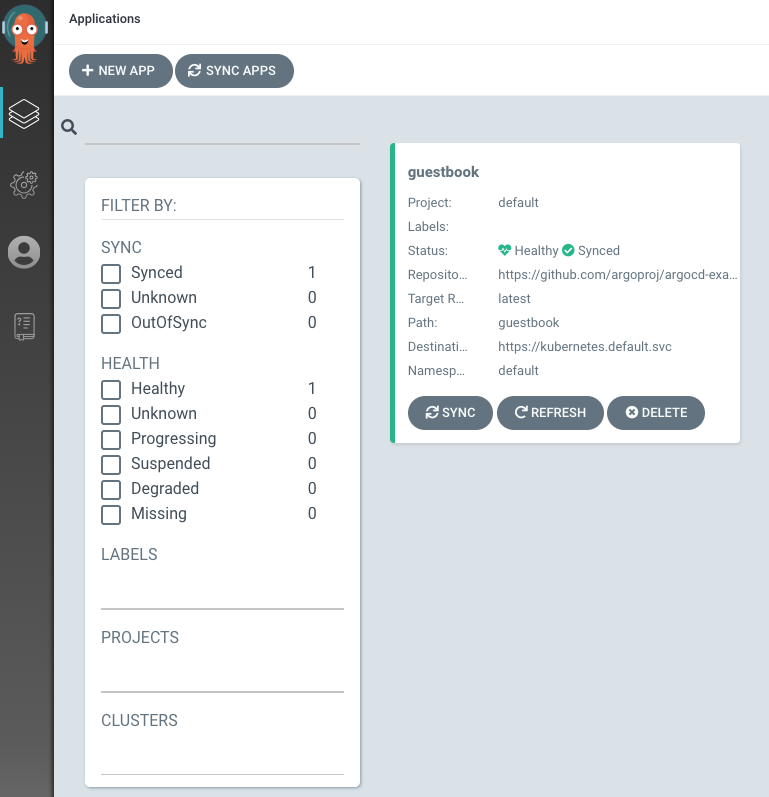
Source: ArgoCD official repository — Apache 2.0 License
Clicking an individual resource shows its YAML manifest, and clicking a Pod lets you view its logs. Being able to do most debugging from the UI without using kubectl is one of ArgoCD’s major advantages.
Diff Review and Rollback
If you want to preview what changes will be applied before syncing, you can check the diff.
argocd app diff nginx-demoIt compares the Git manifests with the current cluster state and shows the differences. This is useful for review purposes before deployment in manual sync mode.
If something goes wrong and you need to revert to a previous state, use rollback.
argocd app history nginx-demoThis command shows the sync history, and you can roll back to a specific revision.
argocd app rollback nginx-demo <REVISION_NUMBER>Of course, the cleanest rollback in a GitOps approach is to create a revert commit in Git. ArgoCD will then automatically sync to the previous state. But in emergencies, CLI rollback is faster.
We’ve now covered the entire process of registering an Application in ArgoCD and performing sync. In the next part, we’ll look at how to use Kustomize and Helm with ArgoCD — tools that are practically essential in real-world operations. The focus will be on how to separate and manage manifests per environment.


Loading comments...